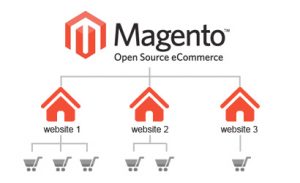
One of the great advantages of Magento is the ability to sell to different locales from one place. Many clients wonder if there is any real difference between Magento Multi Store, Store View and the Website. This question is especially relevant when you want to set up another online store. No matter when you wish to set your store, Magento is always the right choice.
Magento Multi Store
Often times people wonder why and how the multi store function of Magento is useful. There are plenty of reasons to setup your store with the multi store functionality. For example, if you are having one brand with both male and female clothing, you can have two separate areas for the ladies and men individually with just a single administrator interface to control the two stores.
If you are still not convinced, consider this. If you setup multiple stores, you will have to also handle the back end admin stuff like categories, products, marketing for the different stores individually. That means for any back of the store work, you will have to login to each individual store before you can continue. But with Magento multi store, a wide range of features are available through the single login admin.
If you have any questions with regards to Magento Hosting, we at Aspiration Hosting can most definitely help you. We specialize in high performance Cloud Hosting services with our main focus being Magento Hosting solutions as well as other PHP Applications like Simple Machines Forum (SMF), WordPress, Drupal, Joomla and also MediaWiki. Aspiration Hosting uses powerful CloudLinux servers and the most advanced technologies which allows us to offer one of the fastest hosting in the industry. We also have the world’s top notch Customer Support that is available 24×7, all year round. Check out our customer reviews.
How to setup the Magento Multi Store
1. Log into your Magento admin panel.
2. Find the Catalog tab to select Manage Categories.
3. After that, click on the Add Root Category button.
4. Enter your title on the right where it says Name and set the drop-down to Yes for both Is Active and Is Anchor.
5. Press the Save Category button.
6. Move on to the System tab and choose Manage Stores.
7. Click on the Create Website button.
8. Insert (for example Shoes.com) for the Name and once again for the Code. Write this value down for the future and press save website
Once you go through the 8 simple steps above, start setting up your store.
9. Click on Create Store.
10. For the Website, pick the store (e.g. Shoes.com) from the drop-down menu and for the Name, enter Main Store and for the Root Category, select the Shoes.com.
11. Press the Save Store button and click on Create Store View after.
12. For the Store, pick Main Store from the drop-down menu and or the Name, enter English. Similarly for the Code, put in shoes_en. For the Status, select Enabled.
13. Click the Save Store View button and move to the System tab and also select Configuration.
14. After that for the Current Configuration Scope change the drop down from Default Config to Shoes.com.
15. Select Web from the sidebar under the General heading.
16. For both the Unsecure and Secure sections, uncheck the default box next to the Base URL item. Enter the URL for your store. Click the Save Config button.
An overview of the Magento Multi Store

Each store should contain at least one store view. Magento Store View is recommended for handling multiple languages at your site. However don’t just consider the languages but also the location of your customers. You can easily check out the orders and also update tracking from the admin site for each of your stores in the multi store grid. If you have opted for the Enterprise Edition, you can also assign different admins to your different stores.
We are here to help you… Don’t wait… Contact Aspiration Hosting today!!!
